Browsing pinterest the other day I came across these bobbin earrings, and I just had to make my own version:
They took all of 15 minutes, too.
Start by threading your, uh, thread through one of the holes in the bobbin, from the center out, leaving a tail of an inch or two:
Rather than use actual sewing thread, I used a thick embroidery thread, the Caron Collection's Waterlilies in one of my favorite colors, African Sunset. Yarn would work well, too, and novelty yarns could add some interesting texture.
Wrap the thread around the bobbin, anchoring the tail:
Keep wrapping until you get close to the outer edge of the bobbin, and cut the thread. Using a large, blunt needle, thread the end under a few wraps and out a hole on the other side, to secure the other tail:
Trim the tails flush with the bobbin and add a drop of fray check (or glue or clear nail polish) on the ends, to help keep the thread from unspooling:
It's hard to see (a good thing!), but the fray check is on the hole at one o'clock.
The next step is adding a finding. The earrings on pinterest used a very large ring through the center of the bobbin, but I didn't want the bobbin spinning about freely. I tried wire wrapping but it looked messy and spindly:
Heavier gauge wire would have been better, but I didn't have any in the right color.
Instead I switched to chain to create a hanging loop. Attach a length of chain (mine is five links, make sure yours is an odd number too) to one of the bobbin holes with a jump ring:
and repeat on the other side with the other end of the chain.
Attach your earring finding to the center link:
Done!
Search This Blog
Showing posts with label tutorial. Show all posts
Friday, January 16, 2015
Wednesday, April 23, 2014
A Carrot, Just Because
I made it using peyote stitch and seed beads, size 15 orange and size 11 green.
Body of carrot:
Rounds 1 and 2: String 12 beads onto a length of nymo thread, and pass through the first bead again to form a circle, leaving a fifteen inch tail.
Rounds 3-12: Peyote stitch, adding 6 beads total for each round.
Round 13: Peyote stitch around, but decrease once by passing through two beads of the previous round without adding a new bead; add a total of 5 beads.
Rounds 14-16: Peyote stitch, adding 5 beads total for each round.
Round 17: Peyote stitch around, decreasing by one bead for a total of 4 beads added this round; try to place decrease on opposite side of carrot as previous decrease.
Round 18-20: Peyote stitch, adding 4 beads total for each round.
Round 21: Peyote stitch around, decreasing by one bead for a total of 3 beads added this round; try to place decrease on opposite side of carrot as previous decrease.
Round 22-24: Peyote stitch, adding 3 beads total for each round.
Round 25: Peyote stitch around, decreasing by one bead for a total of 2 beads added this round; try to place decrease on opposite side of carrot as previous decrease.
Round 26: Peyote stitch around, adding two beads total. Pull stitching tight to close, and weave and end thread.
Top of carrot:
Thread needle with tail and peyote stitch around, decreasing by one bead for a total of 5 beads added.
Repeat, decreasing once for a total of 4 beads added. Pull tight, and weave thread through a few beads to secure, before exiting through one of the last four beads added. Do not cut thread.
Leafy top (branched fringe):
String 9-13 beads; skipping last bead added, go back through 4-5 beads and pull snug.
Add 8-12 beads, and skipping last bead added, go back through 3-4 beads and pull snug.
Add 4 beads, and skipping last bead added, go back through three beads. Go back through the rest of the beads that are on the "vertical" line (i.e. not part of the two little branches you made). Exit the very first green bead you added, and pass through the next orange bead in the last round.
Repeat three more times, for a total of four fringes. To finish, weave thread back through the carrot and clip.
Body of carrot:
Rounds 1 and 2: String 12 beads onto a length of nymo thread, and pass through the first bead again to form a circle, leaving a fifteen inch tail.
Rounds 3-12: Peyote stitch, adding 6 beads total for each round.
Round 13: Peyote stitch around, but decrease once by passing through two beads of the previous round without adding a new bead; add a total of 5 beads.
Rounds 14-16: Peyote stitch, adding 5 beads total for each round.
Round 17: Peyote stitch around, decreasing by one bead for a total of 4 beads added this round; try to place decrease on opposite side of carrot as previous decrease.
Round 18-20: Peyote stitch, adding 4 beads total for each round.
Round 21: Peyote stitch around, decreasing by one bead for a total of 3 beads added this round; try to place decrease on opposite side of carrot as previous decrease.
Round 22-24: Peyote stitch, adding 3 beads total for each round.
Round 25: Peyote stitch around, decreasing by one bead for a total of 2 beads added this round; try to place decrease on opposite side of carrot as previous decrease.
Round 26: Peyote stitch around, adding two beads total. Pull stitching tight to close, and weave and end thread.
Top of carrot:
Thread needle with tail and peyote stitch around, decreasing by one bead for a total of 5 beads added.
Repeat, decreasing once for a total of 4 beads added. Pull tight, and weave thread through a few beads to secure, before exiting through one of the last four beads added. Do not cut thread.
Leafy top (branched fringe):
String 9-13 beads; skipping last bead added, go back through 4-5 beads and pull snug.
Add 8-12 beads, and skipping last bead added, go back through 3-4 beads and pull snug.
Add 4 beads, and skipping last bead added, go back through three beads. Go back through the rest of the beads that are on the "vertical" line (i.e. not part of the two little branches you made). Exit the very first green bead you added, and pass through the next orange bead in the last round.
Repeat three more times, for a total of four fringes. To finish, weave thread back through the carrot and clip.
Sunday, March 9, 2014
Chain of Hearts
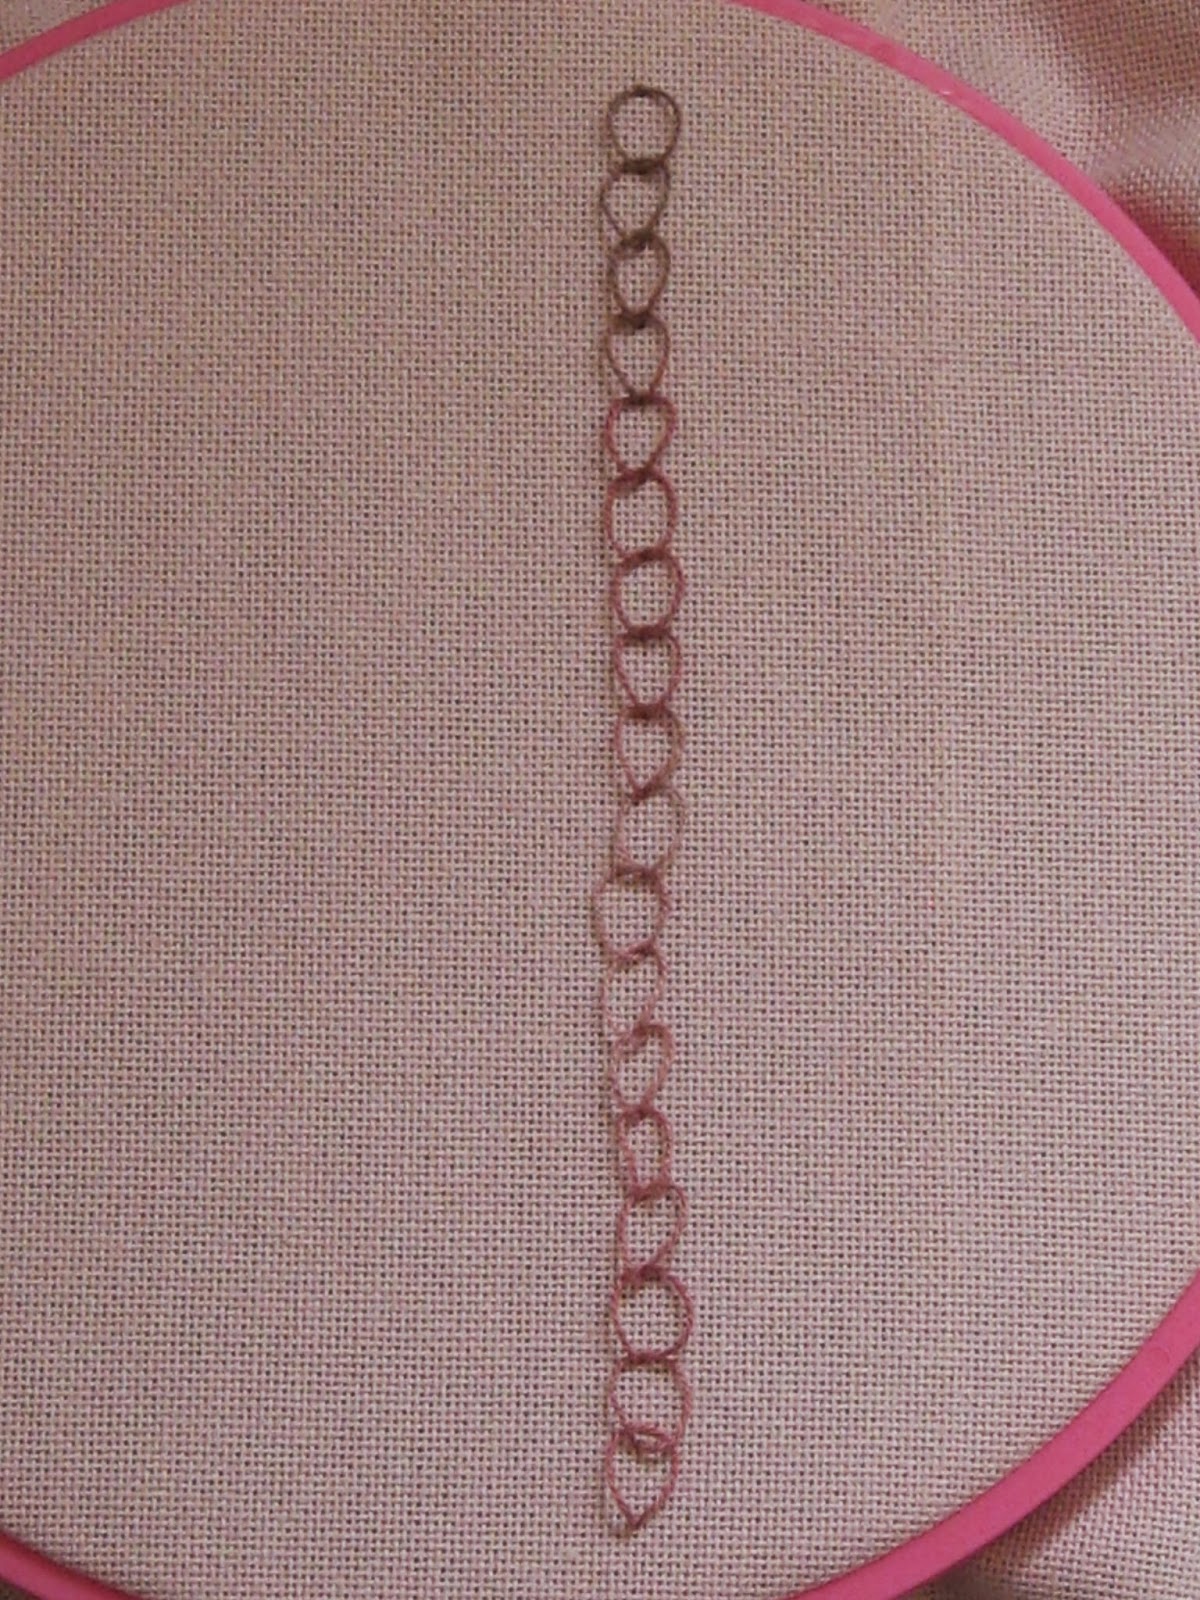
When I made the crazy patch for my heart sampler, I tried to use as many heart-related stitches as I could, including an experiment with chain stitch:
I liked the way it came out, so I decided to do it again in a more rigorous manner, complete with step-by-step instructions.
Make a row of very loose chain stitch, going from the bottom up:
Once you get to the top, go back down working tacking stitches to shape the hearts -- one on each side, a little above the insertion points in the fabric:
With all but the top heart, the two tacking stitches cause the top of the loop to stretch flat across. Add a third tacking stitch in the middle, coming up at the insertion point and back down one thread above (or in the same hole, if you wish):
Continue all the way down to make a chain of hearts!
(You can see how I got better as I practiced -- those bottom hearts are a little blobby.)
While searching Pintangle's Take a Stitch Tuesday archives for another project, I came across a chain stitch variant called shell chain stitch. That pretty stitch plus the hearts inspired me to start a chain stitch sampler:
I liked the way it came out, so I decided to do it again in a more rigorous manner, complete with step-by-step instructions.
Make a row of very loose chain stitch, going from the bottom up:
Once you get to the top, go back down working tacking stitches to shape the hearts -- one on each side, a little above the insertion points in the fabric:
With all but the top heart, the two tacking stitches cause the top of the loop to stretch flat across. Add a third tacking stitch in the middle, coming up at the insertion point and back down one thread above (or in the same hole, if you wish):
Continue all the way down to make a chain of hearts!
(You can see how I got better as I practiced -- those bottom hearts are a little blobby.)
While searching Pintangle's Take a Stitch Tuesday archives for another project, I came across a chain stitch variant called shell chain stitch. That pretty stitch plus the hearts inspired me to start a chain stitch sampler:
Sunday, January 30, 2011
Hearts and Yo-Yos
While going through magazine patterns looking for the Hawai'ian applique, I realized I have quite a few heart patterns. I thought it might be nice to piece a bunch of these together to form a sampler. So they'd all fit together well, the squares (or rectangles) will have sides whose lengths are multiples of three.
One pattern had an elongated heart made from yo-yos. I made 14 1 inch yo-yos and sewed them onto a rectangle 3.5 by 6.5 (unfinished):
I love yo-yos. They are fun to make, versatile, and retro. To make a yo-yo, you could buy a two-piece plastic yo-yo maker that will tell you where to cut and where to sew, but why add more plastic to the planet? (I will confess I have the plastic doodads to make flower-shaped and heart-shaped yo-yos, because those are tricky to do freehand.)
You could break out your compass from Geometry class and draw perfect circles onto your fabric, or even make perfect templates in every size you might want, but that's a lot of perfection for yo-yo making, which is not an exact art.
You could do what people did decades ago, which was to grab cups and saucers and cans and use those as your templates.
But what if you are as lazy as I am, and don't want to go get up off the sofa? My "technique" is adapted from Alton Brown's tip for cutting a parchment paper circle to line a round cake pan. Cut a square with sides that are roughly double (a little bit more if you are hemming the yo-yo) the diameter of the yo-yo you want (no need to use a rotary cutter and ruler for this -- freehand it):
Fold the square in half, and then in half again:
Fold it along the diagonal to make a triangle:
Fold it in half again (and again if you can manage it), forming a wedge shape and keeping the center point in your fingertips:
Now with scissors trim the top of the wedge to even up the outer edges:
This will be the circumference of the circle; if the circle is small (as is mine, with a 2 inch diameter), trimming in a straight line will be good enough. For much larger yo-yos, you may want to trim the top in a gentle arc, mimicking the arc of a circle, or your final shape will be more like a hexadecagon.
Unfold, and you have a rough circle, ready to sew:
Now just sew it as you normally would to make the yo-yo. If you've never done so, it is quite easy. Fold in the edge (or don't, I often make yo-yos with raw edges) and begin a running stitch around the circumference:

Once you get back to the starting point, gently pull the thread on either end to gather the circle up:
Pull tight to close the center, and knot and trim the threads. Pull on the gathers a bit with your fingers to shape the yo-yo if necessary. You're done!
One pattern had an elongated heart made from yo-yos. I made 14 1 inch yo-yos and sewed them onto a rectangle 3.5 by 6.5 (unfinished):
You could break out your compass from Geometry class and draw perfect circles onto your fabric, or even make perfect templates in every size you might want, but that's a lot of perfection for yo-yo making, which is not an exact art.
You could do what people did decades ago, which was to grab cups and saucers and cans and use those as your templates.
But what if you are as lazy as I am, and don't want to go get up off the sofa? My "technique" is adapted from Alton Brown's tip for cutting a parchment paper circle to line a round cake pan. Cut a square with sides that are roughly double (a little bit more if you are hemming the yo-yo) the diameter of the yo-yo you want (no need to use a rotary cutter and ruler for this -- freehand it):
Unfold, and you have a rough circle, ready to sew:
Subscribe to:
Posts (Atom)